ADB and WebIDE
KaiOS 2.5
Now, let’s learn how to install and debug third-party applications on your KaiOS device using ADB and WebIDE. This lets us install apps which might not be available from KaiStore, or ones that you are developing.
Android Debug Bridge, or ADB, is a powerful program bundled within Android SDK Platform Tools and Android Studio that app developers, power users and enthusiasts use to communicate and debug Android-based devices. It unlocks access to functions beyond what the normal user interface provides, such as monitoring system logs, controlling their phones through shell access, installing APKs, tweaking the system by setting device properties.
Although KaiOS and Firefox OS are not directly based on Android and you cannot install APKs on them, the Gonk hardware interaction layer makes significant use of Android’s well-established hardware compatibility, including the adbd daemon and the ability to use ADB on a host computer to interact with the phone over USB or TCP. This is for the sake of deploying the OS onto different hardware, without increasing the cost for research and development.
Meanwhile, WebIDE, short for Web Integrated Development Environment, enables you to create, edit, run and debug web applications on Firefox OS (and later KaiOS) devices and simulators. Built on the former Firefox OS App Manager, it features a code editor, boilerplate code templates, manifest validation, and Firefox debugging tools. Additionally, it allows you to connect your browser to one or multiple “runtimes” for managing app installation.
We’ll refer to this guide as the officially supported method of installing third-party apps onto KaiOS 2.5 devices, for the sake of simplicity. Other methods, such as using Luxferre’s gdeploy, are also available.
This guide only applies to debug-enabled KaiOS 2.5 devices. For debug-enabled KaiOS 3 devices, refer to the instructions for using KaiOS’s
appscmdCLI tool in appscmd or on the official Developer Portal.Because all browsers below are only compiled for x86_64 architecture, Apple Silicon Macs (since macOS 28) and armhf/aarch64 Linux users will need to use
gdeployor build one of the browsers below from source. Windows on ARM users may continue to follow the guide and use the browsers below with the Prism translation layer.Before proceeding, ensure your phone is debug-enabled or that you’ve taken steps to enable debugging.
Be cautious when installing apps from unknown sources! It’s always a good idea to proofread an app’s source code. Even with security measures like prohibiting apps with the
engmode-extensionpermission, KaiOS is still prone to malicious code which can result in performance degradation, data loss or worse.
What we need
- a KaiOS 1.0 or KaiOS 2.5 device;
- an x86_64 computer running Windows, macOS or Linux;
- a USB cable capable of transferring data;
- an Internet connection for both your phone and computer (to access the Developer menu and to download tools);
- an archiver: built-in file manager on macOS/Linux, 7-Zip or WinRAR on Windows;
- latest version of Android Debug Bridge (ADB): Windows, macOS, Linux
- you can also install from your operating system’s package manager:
- Windows:
- Chocolatey:
choco install adb - Scoop:
scoop install main/adb wingetprohibits installing executables with symlinks
- Chocolatey:
- macOS (Homebrew):
brew install android-platform-tools - Debian/Ubuntu:
sudo apt-get install android-sdk-platform-tools-common - Fedora:
sudo dnf install android-tools - Arch Linux/Manjaro:
sudo pacman -S android-tools - Termux (terminal emulator on Android):
pkg install android-tools - tip: If you download the SDK from Android Developers’ website, include the extracted ADB folder in PATH for quick access. This will be handled for you if you’ve installed ADB via package manager.
- Mozilla got rid of the old WebIDE since Firefox 59, so we’ll have to install an older version of Firefox:
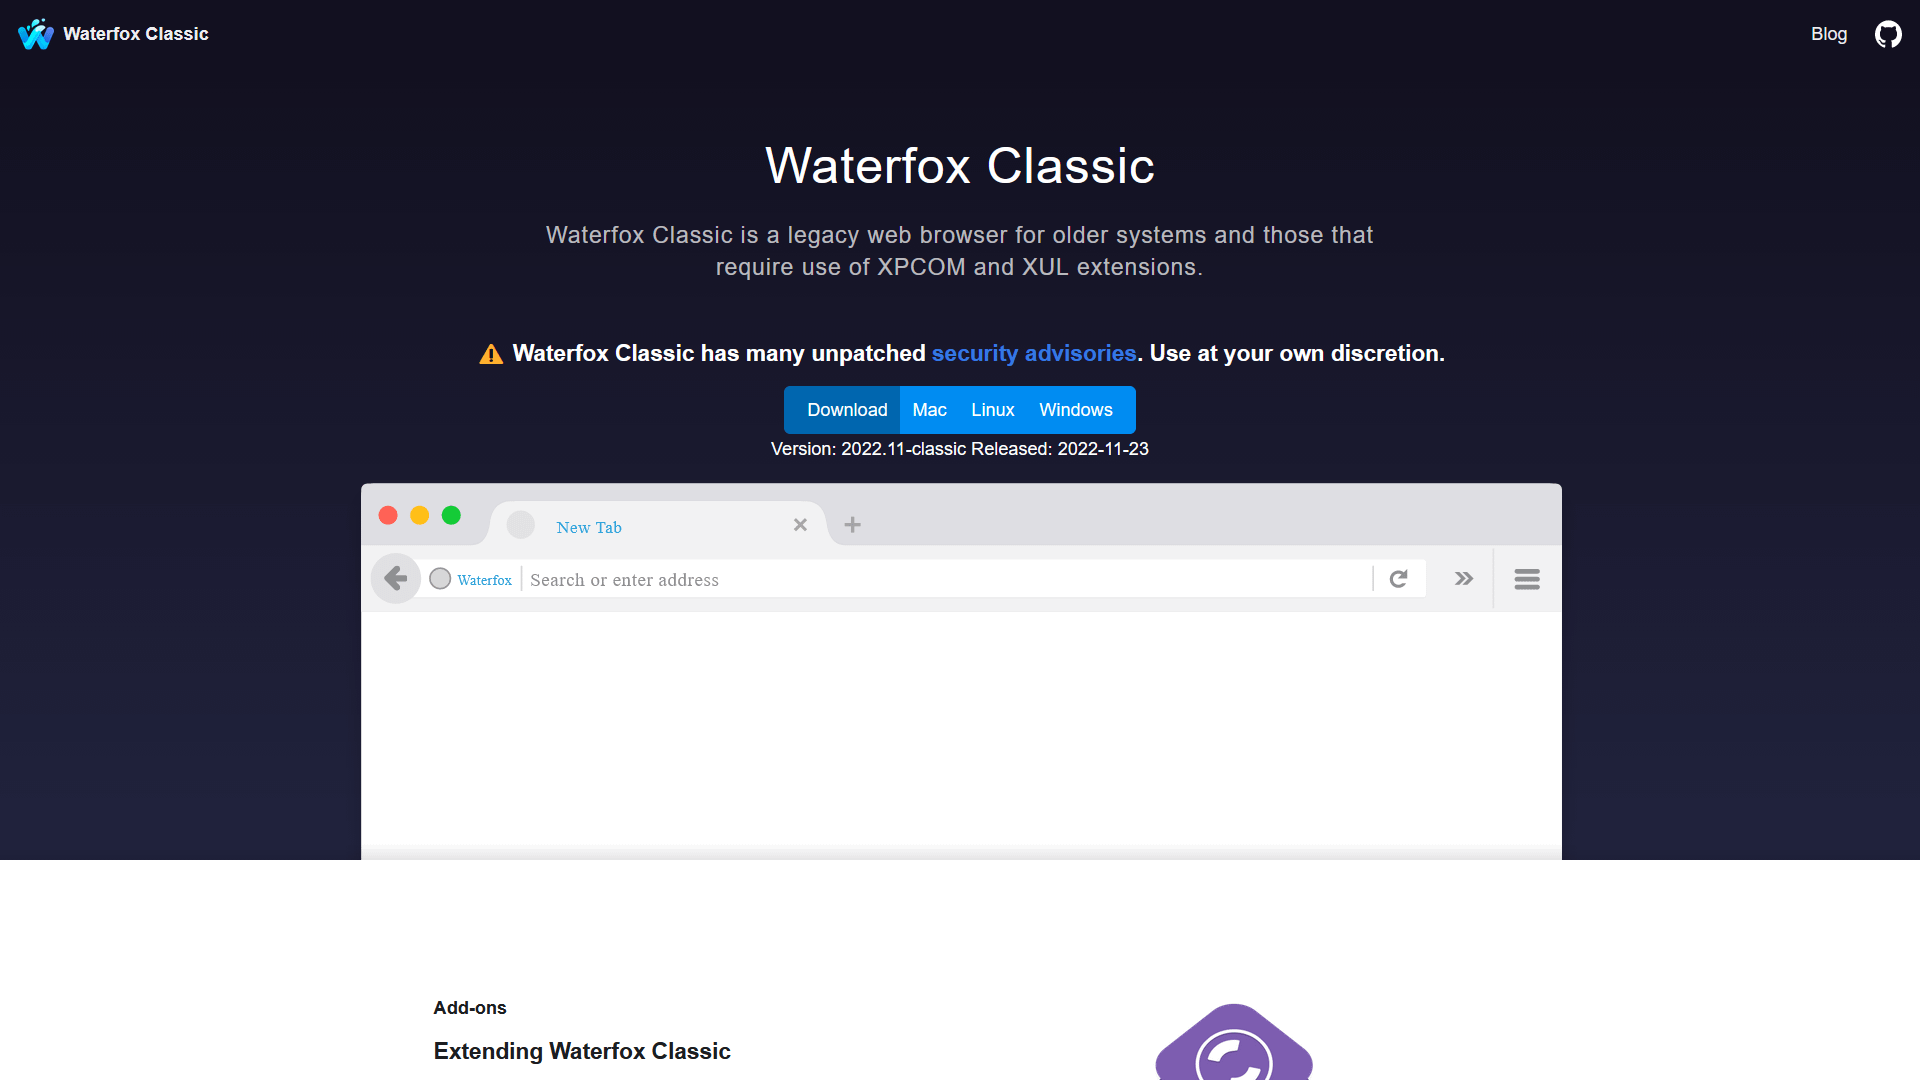
- Waterfox Classic: the most recently maintained browser which still has old WebIDE
- Pale Moon 28.6.1 (Windows/Linux): a popular fork of Firefox with older user interface, legacy Firefox add-on support and always runs in single-process mode.
- Firefox 59 (ESR 52.9): the last official Firefox version to be bundled with working WebIDE and other tools for development on Firefox OS devices, before Mozilla decided to kill the project in 2016. Archives of all Firefox releases can be found on archive.mozilla.org.
- KaiOS RunTime (Ubuntu): official development environment for KaiOS 2.5 made by KaiOS. It’s also possible to get KaiOSRT to work on Windows 10 and later using Windows Subsystem for Linux (WSLg), see this YouTube video.
Need a video tutorial? If you’re on Linux, KaiOS Technologies officially made one for their own WebIDE client KaiOSRT which can be found on their channel. Alternatively, there’s also one on BananaHackers’ YouTube channel.
Begin by turning on debugging mode on your phone and connecting it to the computer with the USB cable. Each device has different guides to turn on debugging mode; if you’re unsure, it’s best to look up your phone on the Devices page.
On your computer, install ADB from the package manager, or download the SDK Platform Tools from Android Developers’ website, which should contain the latest version of ADB. Extract the downloaded archive to a folder, then navigate to the platform-tools folder using Command Prompt or Terminal.
Start the ADB daemon by typing adb devices. ADB will automatically detect your phone in debugging mode. Proceed when you see a device, otherwise:
- if the operating system states that
adbis not a valid command, check if you’re in the right folder and/or ifplatform-toolswas properly added in PATH. You may need to specify./adb.exe devicesto tell the OS where to look foradb.exe, or makeadban executable:chmod +x adb. - if ADB executes but nothing appears under “List of devices attached” (as shown below), check if your phone is properly connected to the computer. On Windows, you may need to open Driver Manager (Win + R,
devmgmt.msc) and look for any USB peripherals with missing drivers, install accordingly if not. - if you’re connecting to a Linux-based computer, you may need to go to Settings, Storage and turn on USB Storage on the phone for
udevto properly register your phone as a USB peripheral with external storage. An icon in the status bar will indicate USB storage access. (if you don’t like the behaviour, see Setting up USB access on Linux below.) - on macOS and Linux,
udevandlsusbare your friends to troubleshoot any USB connection issues here - if a device appears as
unauthorized, it means that you need to approve the ADB connection to your phone with a pop-up on your phone’s screen. Except… KaiOS does not have such thing! You’re pretty much stuck here until someone figures out how to get your phone accessible by ADB.
$ adb devices
* daemon not running; starting now at tcp:5037
* daemon started successfully
List of devices attached
1a2b3c4d        device
Connect to ADB over Wi-Fi
If you are in a rush and wish to connect to your phone wirelessly, turn on Wi-Fi on your phone, set the TCP/IP socket on the phone to 5555:
$ adb tcpip 5555
restarting in TCP mode port: 5555
Disconnect the USB cable, wait a moment, then run:
$ adb connect 192.168.1.14:5555
connected to 192.168.1.14:5555

$ adb devices
List of devices attached
192.168.1.14:5555       device

$ adb forward tcp:6000 localfilesystem:/data/local/debugger-socket
6000
Replace 192.168.1.14 with your phone’s IP address assigned by local network—the same network your computer is on.
You can find your phone’s local IP (192.168.1.x) by opening Settings, Network & Connectivity, Wi-Fi, Available networks, click on the connected Wi-Fi network and look under IP address; or download N4NO’s My IP Address from KaiStore.
It’s also possible to connect to your phone entirely without an USB cable, though the connection will be less reliable. See Connect to ADB wirelessly for more details.
Download and install either the latest version of Waterfox Classic, Firefox 59/ESR 52.9 or Pale Moon 28.6.1 corresponding to your operating system. We’ll use Waterfox Classic for WebIDE here, as this is the most recently maintained browser to-date, but setting up WebIDE on other browsers should not be different.
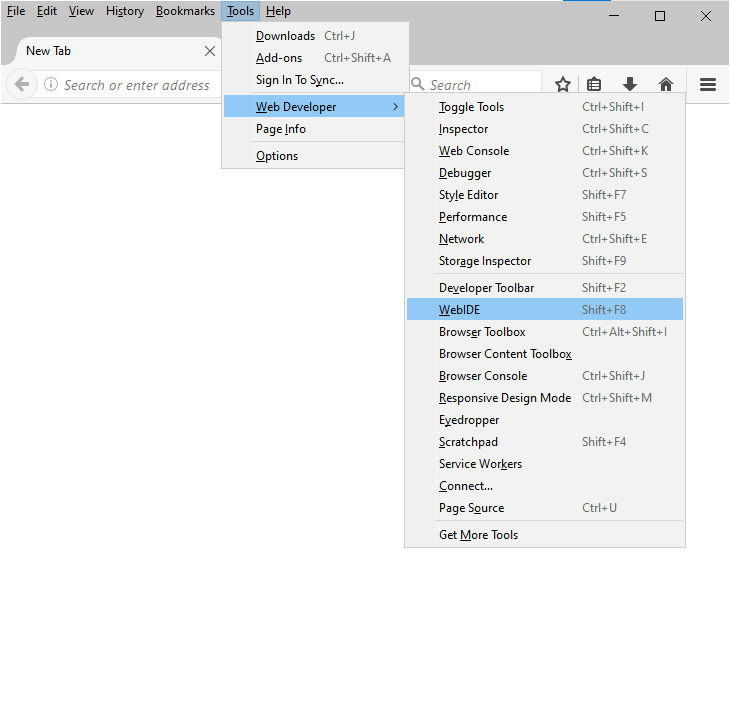
Open the browser and press Alt to show the menu bar, then select Tools, Web Developer, WebIDE (or press Shift + F8).
Tip: Execute this command to open WebIDE without having to start Waterfox Classic beforehand:
waterfox.exe -chrome chrome://webide/content/webide.xul
Your phone’s name should appear in the right pane as an option under USB Devices. Click it to connect.
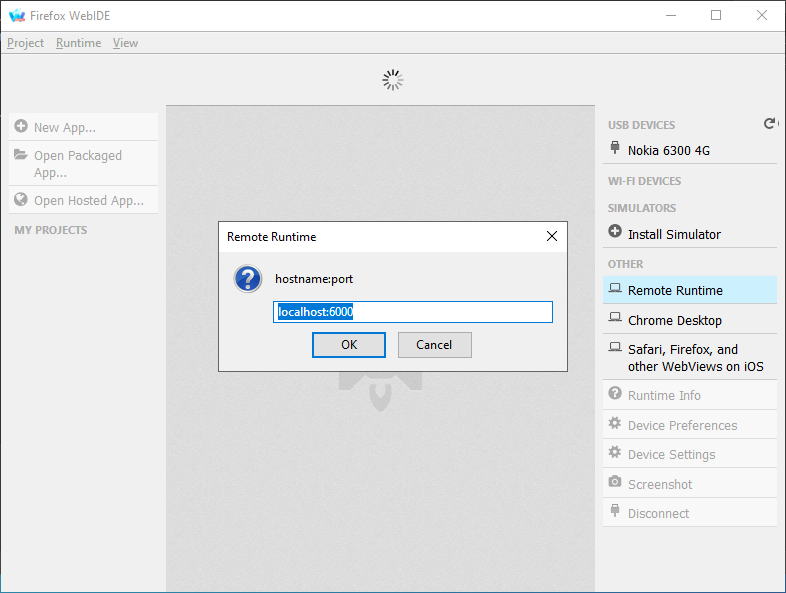
If you don’t see any devices, either because you’re setting up WebIDE for the first time, or your browser doesn’t have a working adbd daemon, forward ADB access to TCP socket 6000:
adb forward tcp:6000 localfilesystem:/data/local/debugger-socket
Then, click Remote Runtime in the right pane, leave it as default at localhost:6000 and press OK. If you still see a yellow banner stating “Operation failed: Connecting to Remote Runtime”, either you set the incorrect socket or your phone rejected DevTools access.
If you’re using older browsers to access WebIDE such as Firefox v59 or Pale Moon <28.6.1, at this point you may see a warning header about mismatched build date. You can safely ignore it as WebIDE was mainly designed to support Firefox OS device builds released alongside that Firefox/Pale Moon versions.
To sideload an application, download a packaged file (you can find great apps on BananaHackers Store and GitHub!) and extract it into a dedicated folder. Make sure that there’s a manifest.webapp at the root of the extracted folder. If you see an application.zip (which indicates the app was packaged for OmniSD), unzip it.
In WebIDE, select Open Packaged App in its left sidebar and navigate to the root of the app folder you just extracted (again, make sure that there’s a manifest.webapp at its root!)
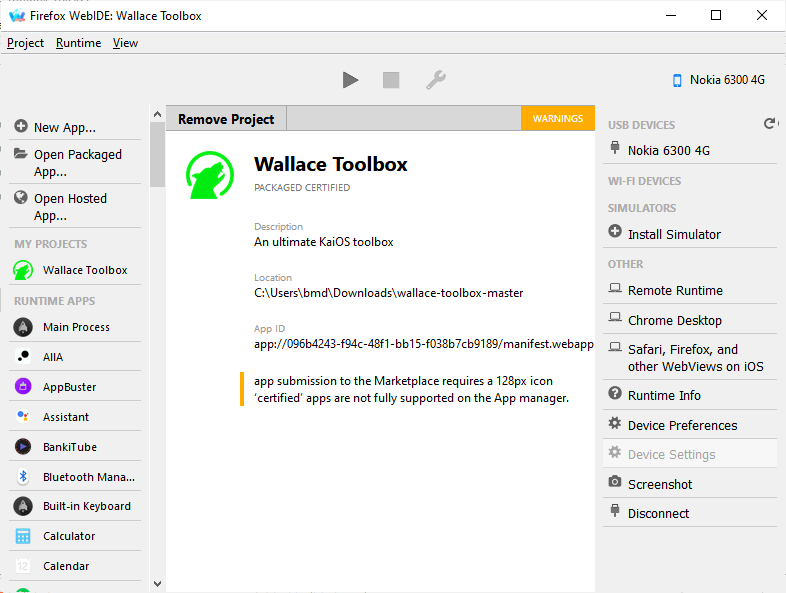
Once you get the app loaded with no errors, press the triangle Install and Run in the top bar to sideload.
Feel free to ignore this warning: “app submission to the Marketplace requires a [size in px] icon”. if you were to upload your apps to the Firefox Marketplace, a 128px icon is required to display your app in the splash screen. While KaiStore also requires app icons to be in certain sizes, a 128px icon is no longer necessary, only 56px and 112px. You can get rid of this error by including a 128px icon in the app’s manifest.
Setting up USB access on Linux
Dedicated to those adrenaline-fueled who want to complicate their lives.
For security reasons, if you want to plug in your phone for debugging only and without USB Storage on, which would grant your computer access to the phone’s internal storage, you will need to set udev rules to grant plugdev read-write access to the socket on your phone.
Initialise udev rules by installing android-sdk-platform-tools-common on Debian and Ubuntu, or android-tools (android-tools-git on AUR) on Arch-based distros. Otherwise, you can also install wget and coreutils if they’re not already installed, then manually download and install 51-android.rules by typing:
$ wget -S -O - https://raw.githubusercontent.com/cm-b2g/B2G/1230463/tools/51-android.rules | sudo tee >/dev/null /etc/udev/rules.d/51-android.rules; sudo udevadm control --reload-rules
wget will fetch a list of udev rules from cm-b2g/B2G, then pass the result to tee which will write the content onto /etc/udev/rules.d/51-android.rules without displaying any output in Terminal, and udevadm will then reload the rules from configured locations.
Plug your phone to the computer using an USB cable and obtain the Vendor ID of the phone:
$ lsusb
Bus 001 Device 007: ID 05c6:f003 Qualcomm, Inc. Nokia 8110 4G
                       ^^^^
In our case, the Qualcomm-based Nokia 8110 4G has the Vendor ID of 05c6.
Open /etc/udev/rules.d/51-android.rules in your preferred text editor with root privileges. Append this line, replace 05c6 with the Vendor ID you got above:
SUBSYSTEM=="usb", ATTR{idVendor}=="05c6", MODE="0664", GROUP="plugdev"
This will allow read-write access to the USB device with vendor ID 05c6 for the system and users in the plugdev group, and read-only access for others (rw-rw-r--). Add yourself in the plugdev group:
# usermod -aG plugdev $LOGNAME
Execute this command as root to make 51-android.rules read-only for all users on the system:
# chmod a+r /etc/udev/rules.d/51-android.rules
Now, create ~/.android/adb_usb.ini in your HOME directory. Open it using your preferred text editor and put the obtained Vendor ID value in HEX: 0xABCD, whereas ABCD is Vendor ID.
$ echo "0x05c6" > ~/.android/adb_usb.ini
Finally, re-run adb devices.
See also
- ADB & Fastboot and WebIDE and other Development tools on BananaHackers website
- Martin Kaptein’s Side-loading and deploying custom apps to KaiOS blog post
- Android Debug Bridge on Arch Linux Wiki, distributed under GNU Free Documentation License 1.3
- Run apps on a hardware device on Android Developers’ website, distributed under Apache 2.0 License